Zyxel NR7102 setup how to migrate Ethernet devices to the 192.168.1.x network + Internet access
Per default, the Zyxel NR7102 (a 5G router) has some atypical settings, which one would not expect. Here’s some notes on how to set the device up. I assume that you are using a PoE switch to power the Zyxel NR7102, and your computer is connected using Ethernet.
The default admin password is on the back of the device.
When the device starts, and you log in for the first time, you will be asked to change the admin password. Also, you can then set up the WiFi network and set up the local timezone.
Usually I had to log in again in another tab, as it would hang after setting the WiFi network. (the WiFi network would be set up correctly, though).
On the next login, the device will ask you for the PIN of your SIM card (and store it).
Disabling IP passthrough for the APN
In order for the devices on your LAN to have local IP addresses as expected, and the Zyxel NR7102 to perform as NAT router, you will have to disable IP passthrough for the APN.
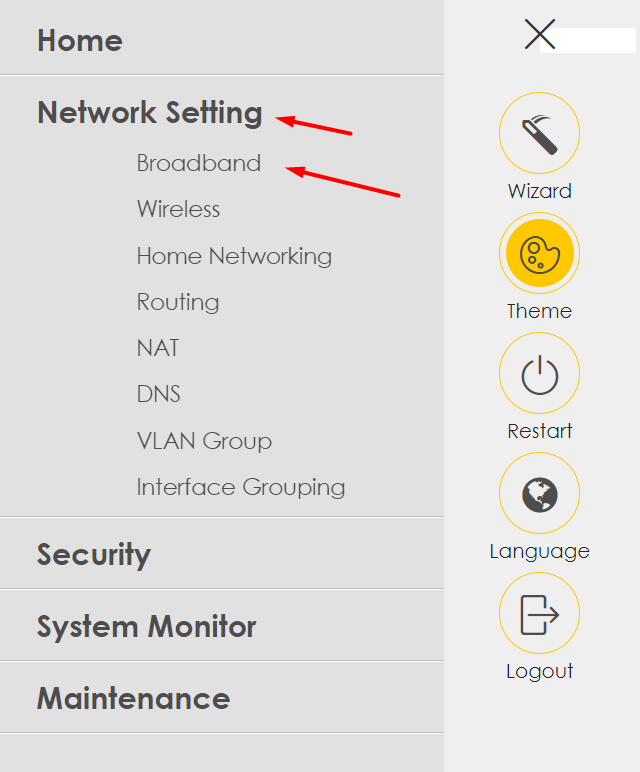
Go to the broadband section:
or access it using the menu:
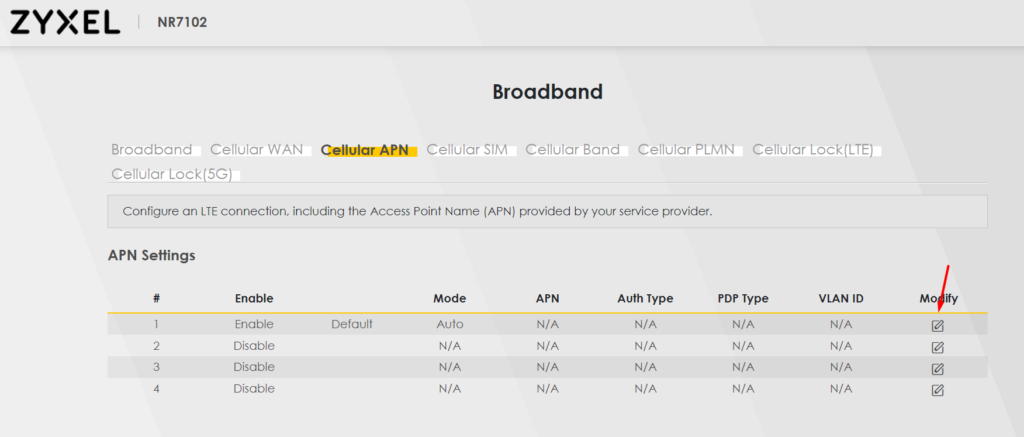
Click on Modify symbol for the first (Default) APN.
Toggle IP Passthrough off, as can be seen in the next screenshot, and click OK.
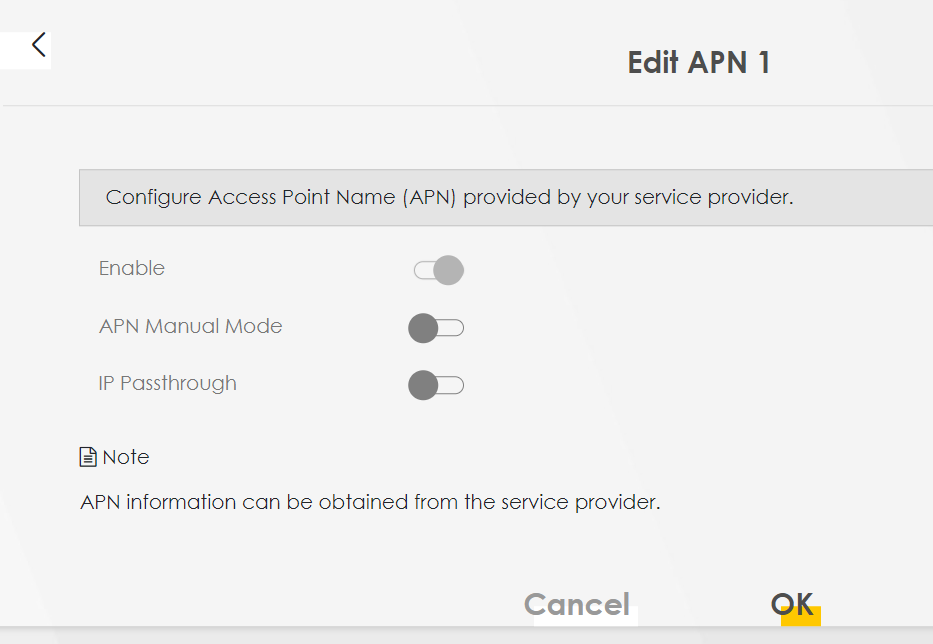
You will now have to unplug and replug your network cable, as previously you were assigned the upstream IP on your computer.
Deleting Interface group
Currently, your WiFi network devices should have IP addresses with 192.168.1.x and your fixed network devices should have IP addresses with 192.168.2.x.
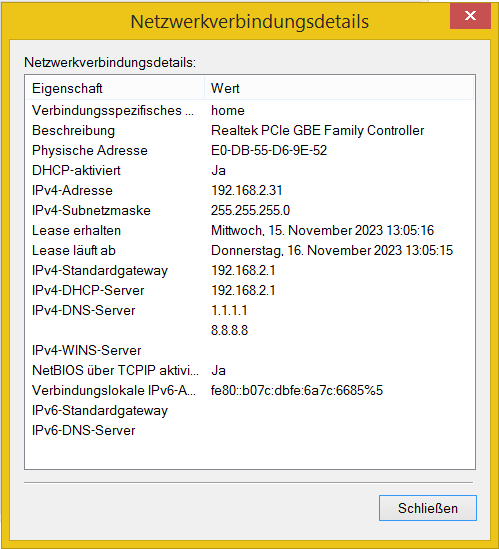
In my case, I was migrating devices from a previous network, where both WLAN and LAN network devices were on the 192.168.1.x network. Since printers were set up with static IPs in the same way, I wanted the same kind of network configuration (all devices on one subnet).
Unfortunately, I was not able to figure out right now how to achieve for both WLAN and LAN devices to be on the same subnet, but I was able to switch the Ethernet devices to the 192.168.1.x subnet.
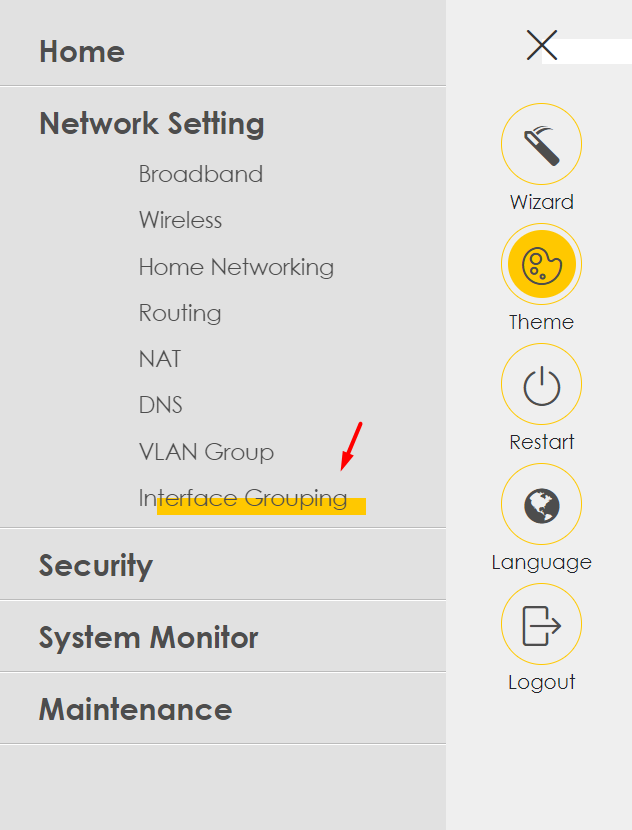
To achieve this, we need to delete one group:
Navigate to
http://192.168.1.1/InterfaceGrouping
or access it using the menu:
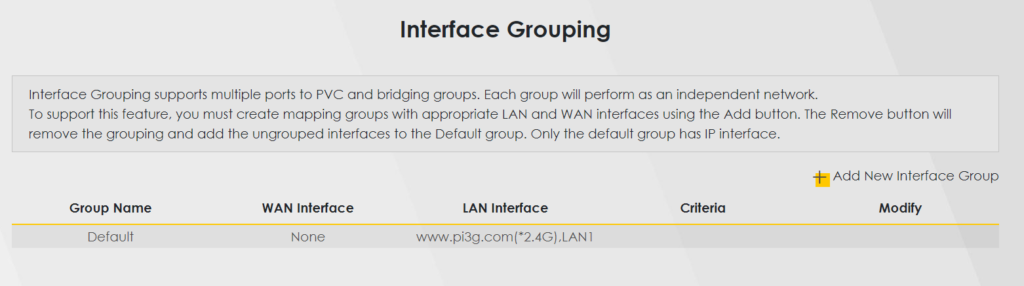
You should now be able to see two groups, one called Default, and without the posibility to delete or modify it, and a second group (I believe called Bridge1), which can be edited.
Delete this second group, which currently has LAN1 in it.
Note: if the interface shows you that the action was not successful, this is probably due to the network change (and the frontend not being able to access the backend until you reset your computer’s IP).
After this, you will need to reconnect to your network again by unplugging and replugging your network cable. This time, your computer should have an IP in the 192.168.1.x range:
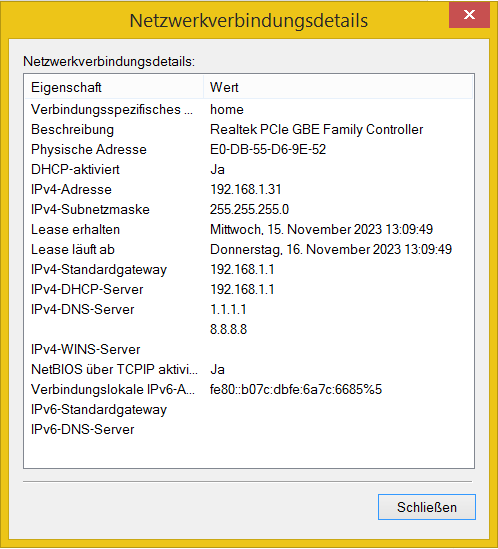
Finished: Ethernet devices are now in the 192.168.1.x network with Internet access for Ethernet devices
Your Ethernet devices should now be in the 192.168.1.x network.
Bonus 1
This is how a new network group looks like:
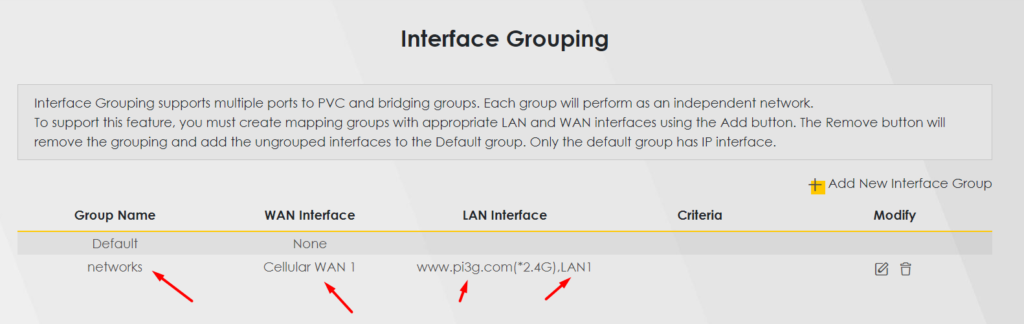
The first new network group will be assigned the 192.168.2.x IP address range by default.
Bonus 2
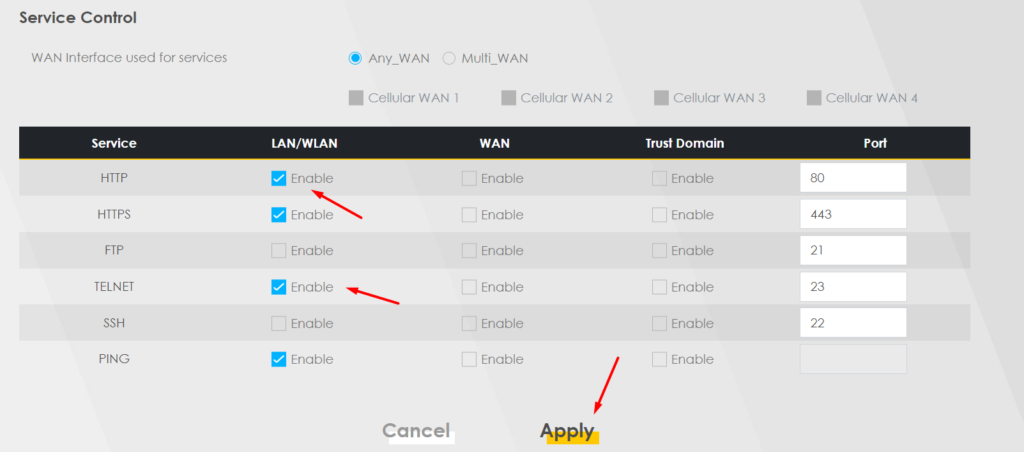
By default, the management interface for the Zyxel NR7102 will be accessible from outside. I suggest to at least turn off http and Telnet access to it:
http://192.168.1.1/RemoteManagement
Important: Please do not turn off https access! Otherwise you will not be able to access your Zyxel router on your local IPs anymore!
After the change (after disabling http), you can access the router on: